A Fireplace Face-Lift Brings Warmth, Modern Look
From: The Orlando Sentinel
Date: January 19, 2008
Byline: G.K. Sharman
ALTAMONTE SPRINGS – Cliff and Barbara Odom’s latest home-improvement project had them between a rock and a hard place.
Their Altamonte Springs home was already in a 10-year-old time warp when they bought it in the early 1990s.
Cliff, a computer programmer, has spent the years since trying to bring it into a more modern era. He has laid tile, built and installed trim, painted throughout and installed crown molding. He even made the furniture in a bedroom.
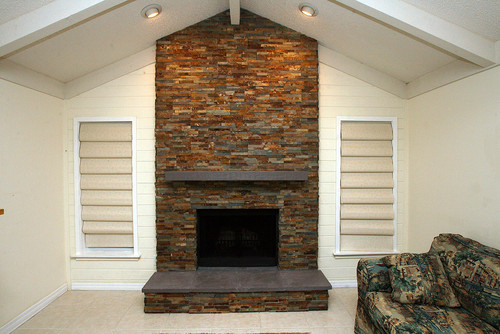
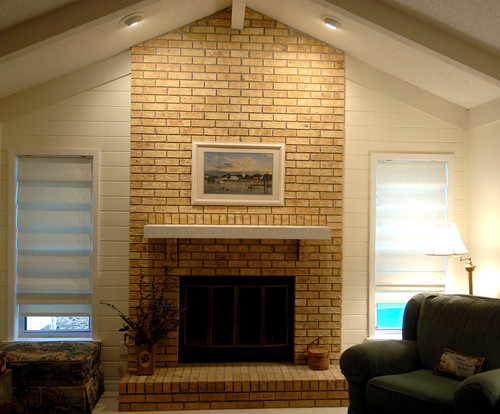
But one item “still screams 1980,” Barbara wrote in her letter to the House Call column: the family-room fireplace.
Someone thought it was a great idea to do it in a yellow-beige brick — which matches the exterior but annoys Barbara.
Stacked stone or woodwork fits their taste better, but they weren’t sure how to start. Could stone or woodwork be installed over the existing brick, they wondered. What should they do with the raised hearth? And which treatment — wood or stone — would look better in their home?
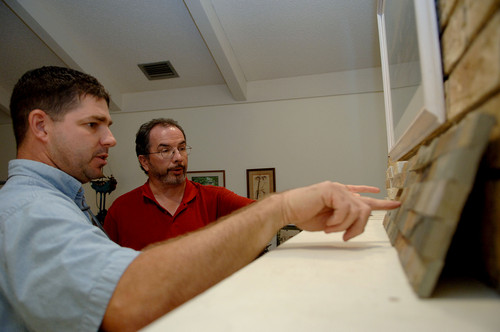
Cliff, who’s careful and particular about his work, was sure he could do the project if he had advice from a pro. He found a kindred spirit in Jim Doane, a tile and masonry craftsman and owner of Jimbo’s Creative Masonry in Sanford. Doane installed the tile in Casa Feliz, the historic Winter Park home that was saved from destruction when it was moved in 2001 and renovated.
Stacking it up
Barbara and Cliff’s top concern was whether they could install stacked stone, which they preferred to woodwork, over the existing brick.
Absolutely, said Doane, who agreed to consult with the couple for the House Call column. He brought along several samples of a homeowner-friendly stacked-stone system from Real Stone Systems Inc. Stone would give them the more homey look they desired, he said.
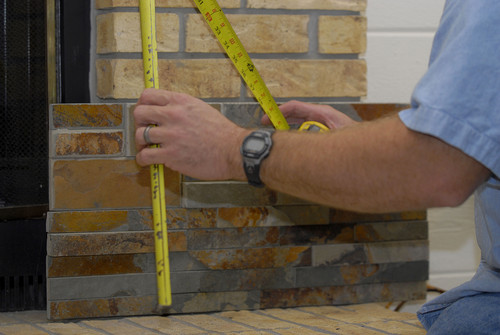
Recycled from slate, quartzite and sandstone quarry scraps, the product comes in 6-by-24-inch panels and goes on like tile, Doane said, except that the panels don’t need grout.
Cliff would have to start by mortaring the brick and filling in the grout joints so that the stone would have a smooth surface to adhere to, he said.
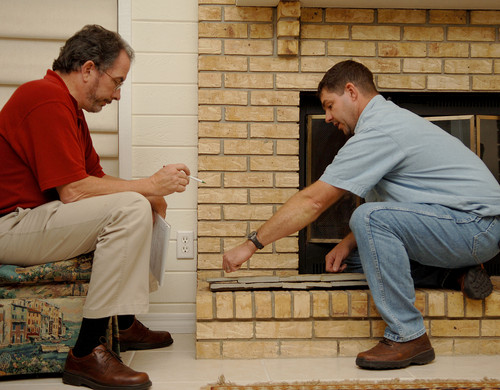
So far, so good for Cliff, who wrote notes on his legal pad. His next assignment was to measure the fireplace and determine how much stacked stone he would have to buy. Doane offered to check his math later.
They also discussed how to line up the bottom row and how to install the corner pieces, which require tricky cuts.
“Your first corner will probably be wrong,” Doane said, “until you get the hang of it. It’s a learning experience.”
Barbara, meanwhile, tried to decide between sandstone — a cooler shade — and terra cotta, which had a warmer feel. She opted for terra cotta.
Doane’s other advice for the Odoms included:
*Protect yourself and your house. Wear safety glasses, and put plywood on the floor to protect the tile.
*Rent a scaffold, so you can have all materials close by without having to go up and down a ladder.
*Take your time. Work in 12-inch intervals and make sure everything fits. And remember that because there are no grout joints, all measurements and cuts have to be precise.
“This is not a fast process,” he said.
He also advised using a gray stone slab to cover the raised hearth. Once the Odoms installed it, they liked it OK but decided it just didn’t “pop.” Doane suggested painting it and, even though they used the same color — gray — Cliff and Barbara say the painted slab makes a much stronger impression than the plain stone.
Cliff followed Doane’s instructions to a T, including his advice to use top-of-the-line materials. For instance, Doane recommended a premium polymer-modified thinset, which is used to adhere the stone. It’s $50 a bag, but it’s the Rolls-Royce of its kind, he said, and it’s worth it.
After working with it, Cliff agreed. The stone is on there to stay. Nothing is going to pop off.
“I’m 100 percent confident in that thinset,” he said.
Learning experience
Recently, Cliff said the fireplace turned out exactly the way he wanted it to. Other homeowners could do the project if they were willing to be precise and patient. He also learned these lessons on the job:
*The stone panels are heavier than they look, especially when you’re applying them to a vertical surface.
*Measuring and setting, especially for the first row, is important. The first row determines where the rest of the stone “tiles” will go. Cliff used spacers to make sure the bottom row was at the right height.
*The adage “measure twice, cut once,” should be changed to “measure 10 times,” he said.
*The job can’t be rushed if it’s going to be done right.
Barbara likes to stand back and admire her new fireplace.
“The whole room has changed” because of it, she said.
She was proud of Cliff’s workmanship and grateful for Doane’s help. In addition to the initial consultation in late October, Doane visited on another occasion and spent an hour with the couple in his Sanford shop. He also was available for three phone calls during the project.
“He not only knows what he’s doing,” Barbara said. “He can communicate it.”
Doane was pleased with his prot?g?s’ work.
“I think they did a great job,” he said. “It was stunning to see the finished stone fireplace. Even more rewarding was the look of great accomplishment and satisfaction on their faces at what they constructed.”
DIY?
Find out what tools you’ll need for this project. Also, check out the pros and cons to doing it yourself vs. using a contractor